Ohio Supercomputer Center (OSC) introduction
Part I of the pre-workshop learning session


1 Introduction
This part introduces high-performance computing and the Ohio Supercomputer Center (OSC). You will learn:
- What a supercomputer is and why they are useful
- What resources the Ohio Supercomputer Center (OSC) provides
- How to access OSC resources through its OnDemand webportal
2 High-performance computing
A supercomputer (also known as a “compute cluster” or simply a “cluster”) consists of many computers that are connected by a high-speed network, and that can be accessed remotely by its users.
Supercomputers provide high-performance computing (HPC) resources, which consists of two main aspects:
- Compute: computing power to run your data processing and analysis
- Storage: storage space for your data and results
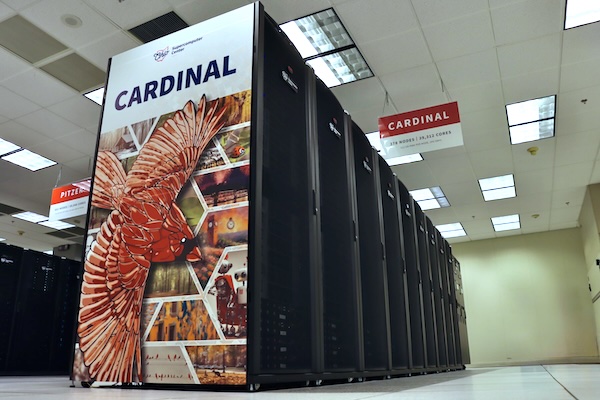
Here are some possible reasons to use a supercomputer instead of your own computer:
- Your analysis takes a long time to run or needs high computational power.
- You need to run an analysis many times.
- Your analysis requires software available only for the Linux operating system, while you have Windows.
- You need to store a lot of data.
When you’re working with omics data, many of these reasons typically apply.
3 The Ohio Supercomputer Center (OSC)
The Ohio Supercomputer Center (OSC) is a facility provided by the state of Ohio — it’s not part of OSU. It has several supercomputers, lots of storage space, and an excellent infrastructure for accessing these resources.
Access to OSC’s compute and storage goes through OSC “Projects”:
- A project can be tied to a research project or lab, or be educational like this workshop’s project (
PAS3454). - Each project has a budget in terms of “compute hours” and storage space1.
- A user can be a member of multiple projects.
OSC has three main websites — in this workshop, we will almost exclusively use the first:
- https://ondemand.osc.edu: A web portal to use OSC resources through your browser (login needed).
- https://my.osc.edu: Account and project management (login needed).
- https://osc.edu: General website with information about the supercomputers, installed software, and usage.
4 The structure of a supercomputer center
4.1 Terminology
Let’s start with some (super)computing terminology, going from smaller to bigger things:
- Node
A single computer that is a part of a supercomputer. - Supercomputer / Cluster
A collection of connected computers. OSC currently has three: “Ascend”, “Cardinal”, and “Pitzer”. - Supercomputer Center
A facility like OSC that has one or more supercomputers.
4.2 Supercomputer components
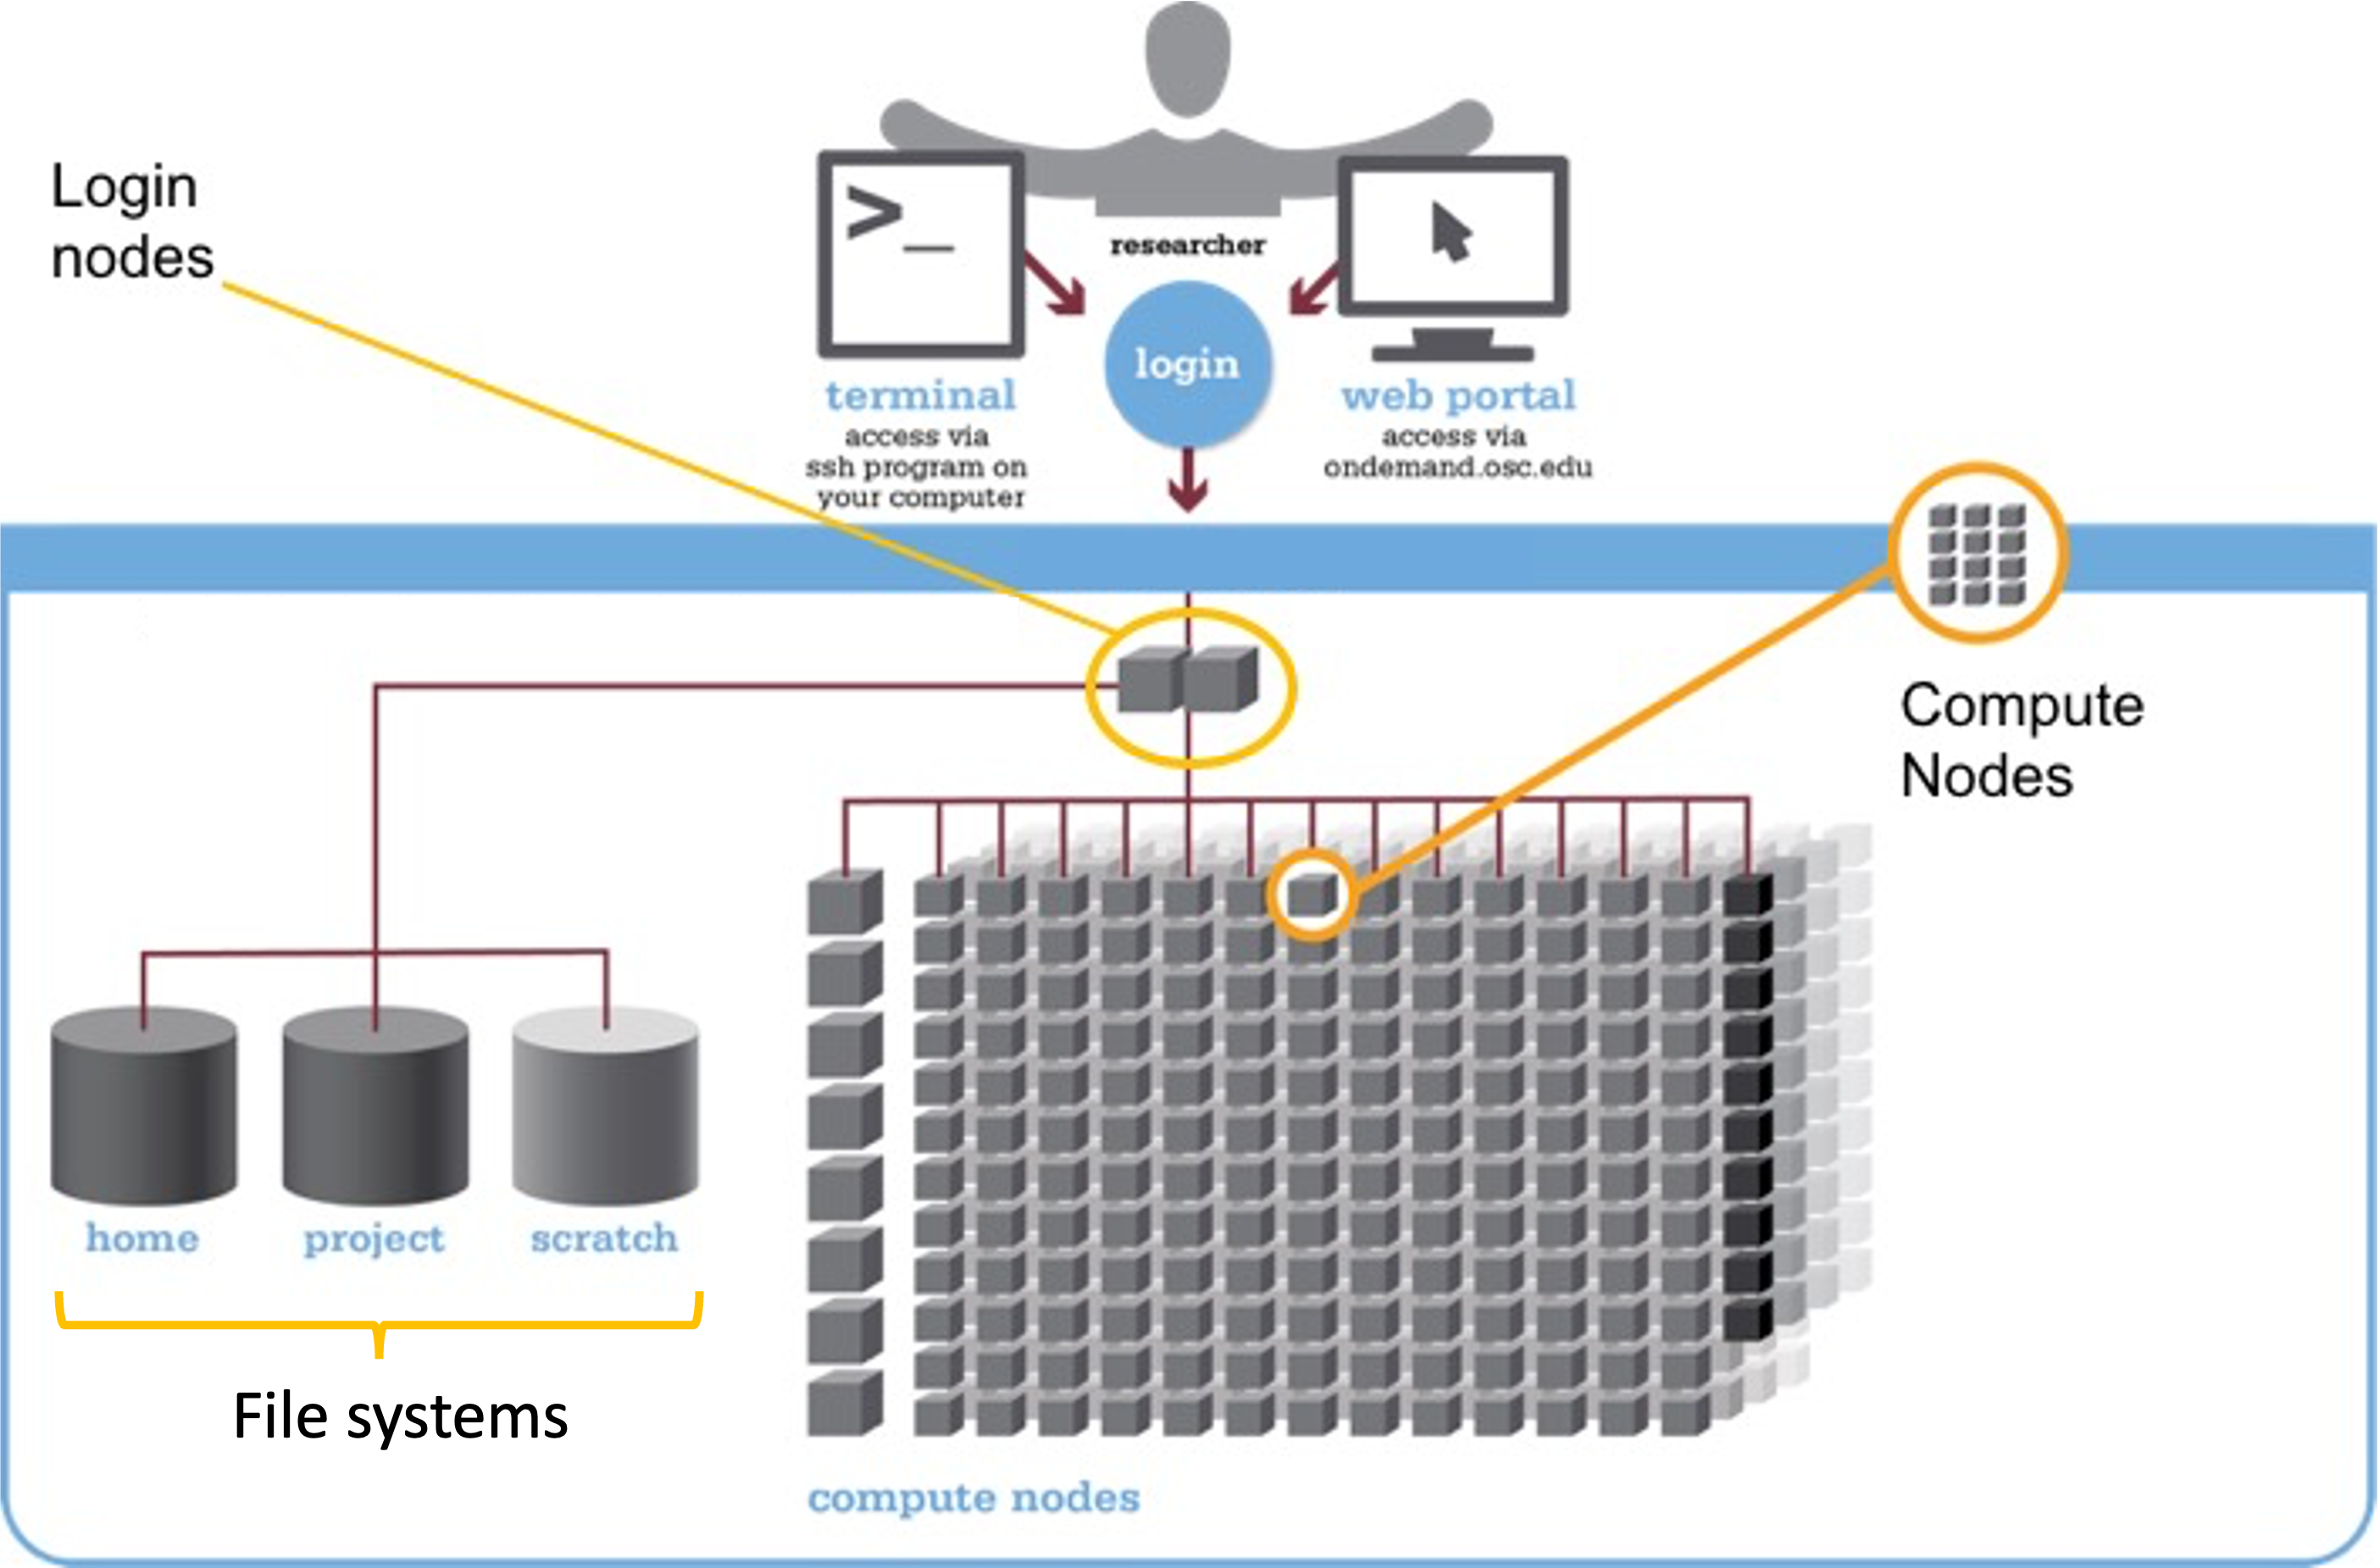
We can think of a supercomputer as having the following main parts:
- File Systems: Where files are stored (shared between the various OSC supercomputers!)
- Nodes, with a key distinction between:
- Login Nodes: The computers everyone shares after logging in (only a handful per supercomputer)
- Compute Nodes: The computers you can reserve to run your analyses (many per supercomputer)
File systems
OSC has several distinct file systems, and it is important to know which one to use for which purpose:
| File system | Located at | Main purpose | How many |
|---|---|---|---|
| Project | /fs/ess/ |
OSC’s main project-based storage | One per OSC Project |
| Scratch | /fs/scratch/ |
Additional, temporary project-based storage | One per OSC Project |
| Home | /users/ |
General, personal files | One per user |
During the workshop, we’ll work in the scratch folder of the workshop’s OSC Project PAS3454, located at /fs/scratch/PAS3454.
- A path is the location of a file or folder on a computer.
- A directory (or “dir” for short) is simply another word for a folder.
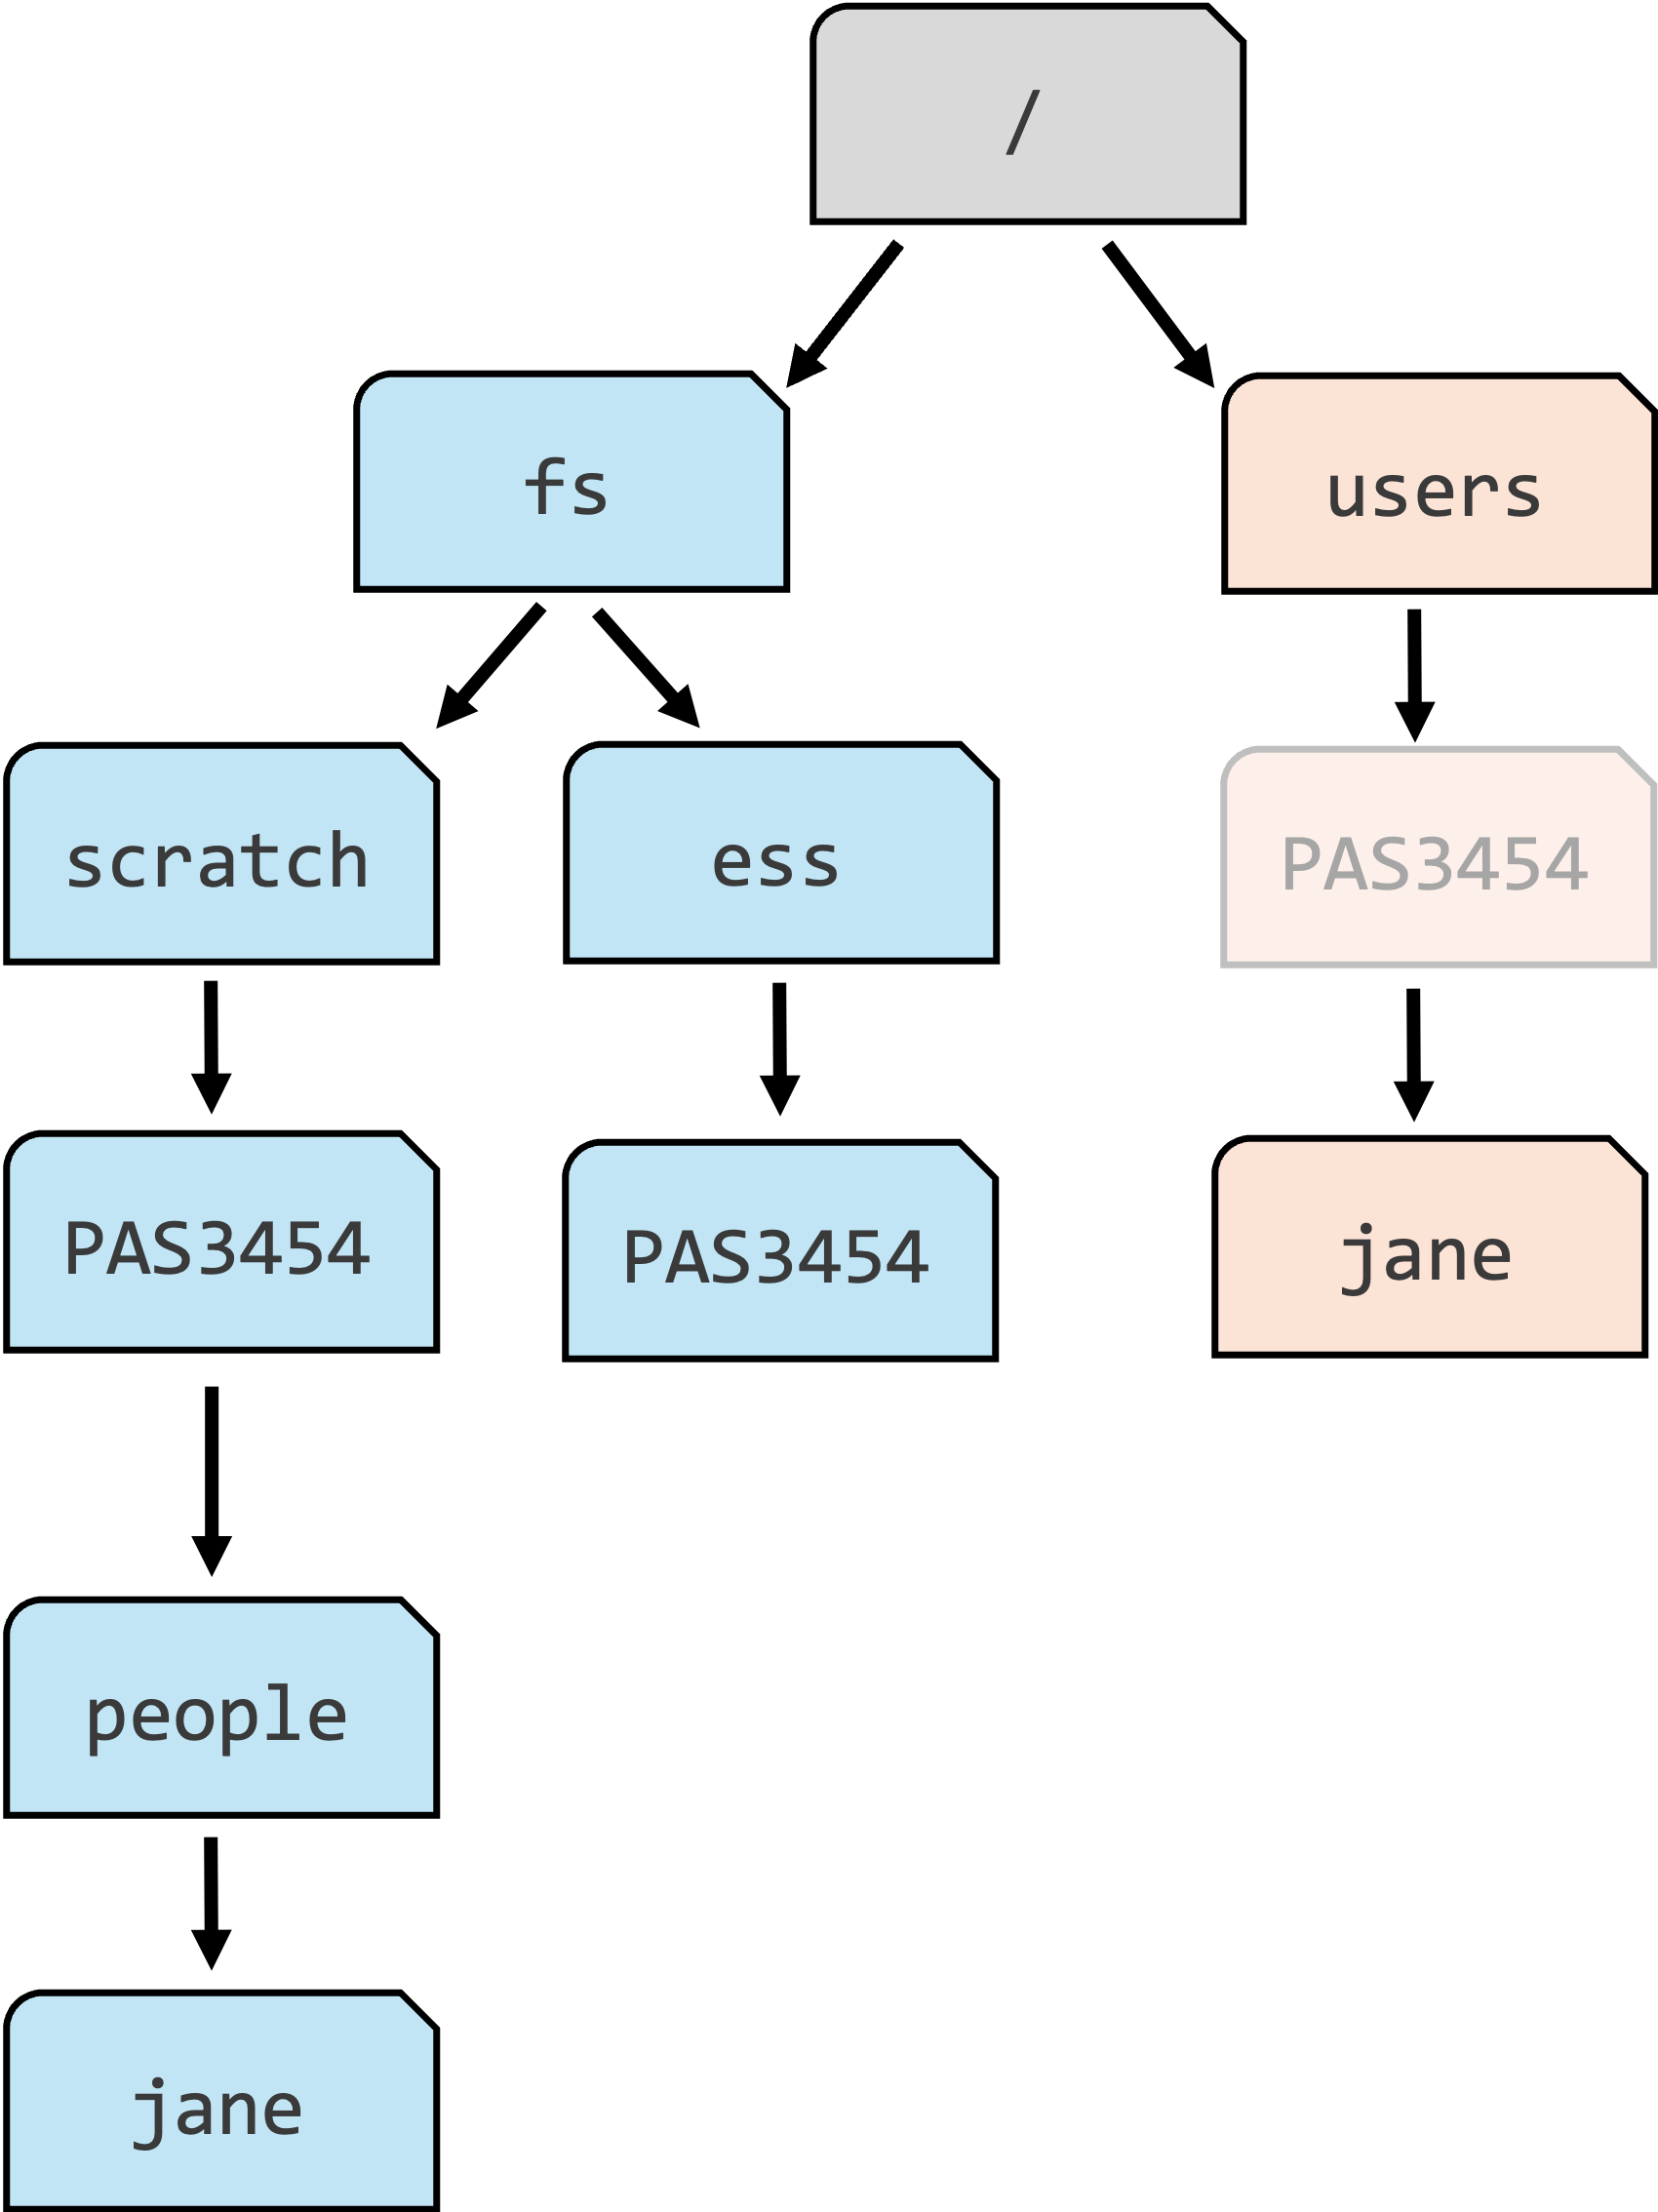
/fs/scratch/PAS3454/people/jane, and not in her Home dir /users/PAS3454/jane.Many new OSC users are confused about the Home directory, so let’s clarify a few things:
Even though a project number is part of the path to your Home directory (e.g.,
/users/PAS3454/jane) this is merely an OSC naming convention and your Home directory is not tied to any OSC Project. Thefore, your Home directory will remain the same even if you are, say, removed from a project.By default, you will be placed in your Home directory when you –e.g.– log in to OSC. But this is typically not where you want to be when working with data and running analyses. During this workshop, for example, you should be within
/fs/scratch/PAS3454/— we’ll show you how to navigate there.
Avoid storing research project file in your Home dir: it has limited space and is harder to access by collaborators.
Your Home dir will contain some automatically generated files and those should generally not be deleted!
Login vs. compute nodes
Login nodes are an initial landing spot for everyone who logs in to a supercomputer. Each supercomputer only has a handful of login nodes, and they are shared among everyone and cannot be reserved for exclusive usage. Login nodes are meant for things like organizing files and creating scripts for compute jobs, and not for serious computing.
Compute nodes are where data processing and analysis is done. You can only use compute nodes after putting in a request for resources (a “compute job”). A scheduling program called Slurm then assigns the requested resources: for example, you may get exclusive access to a specific compute node for two hours.
- The distinction between login nodes and compute nodes
- The distinction between your Home folder and folders associated with OSC Projects
5 OSC OnDemand
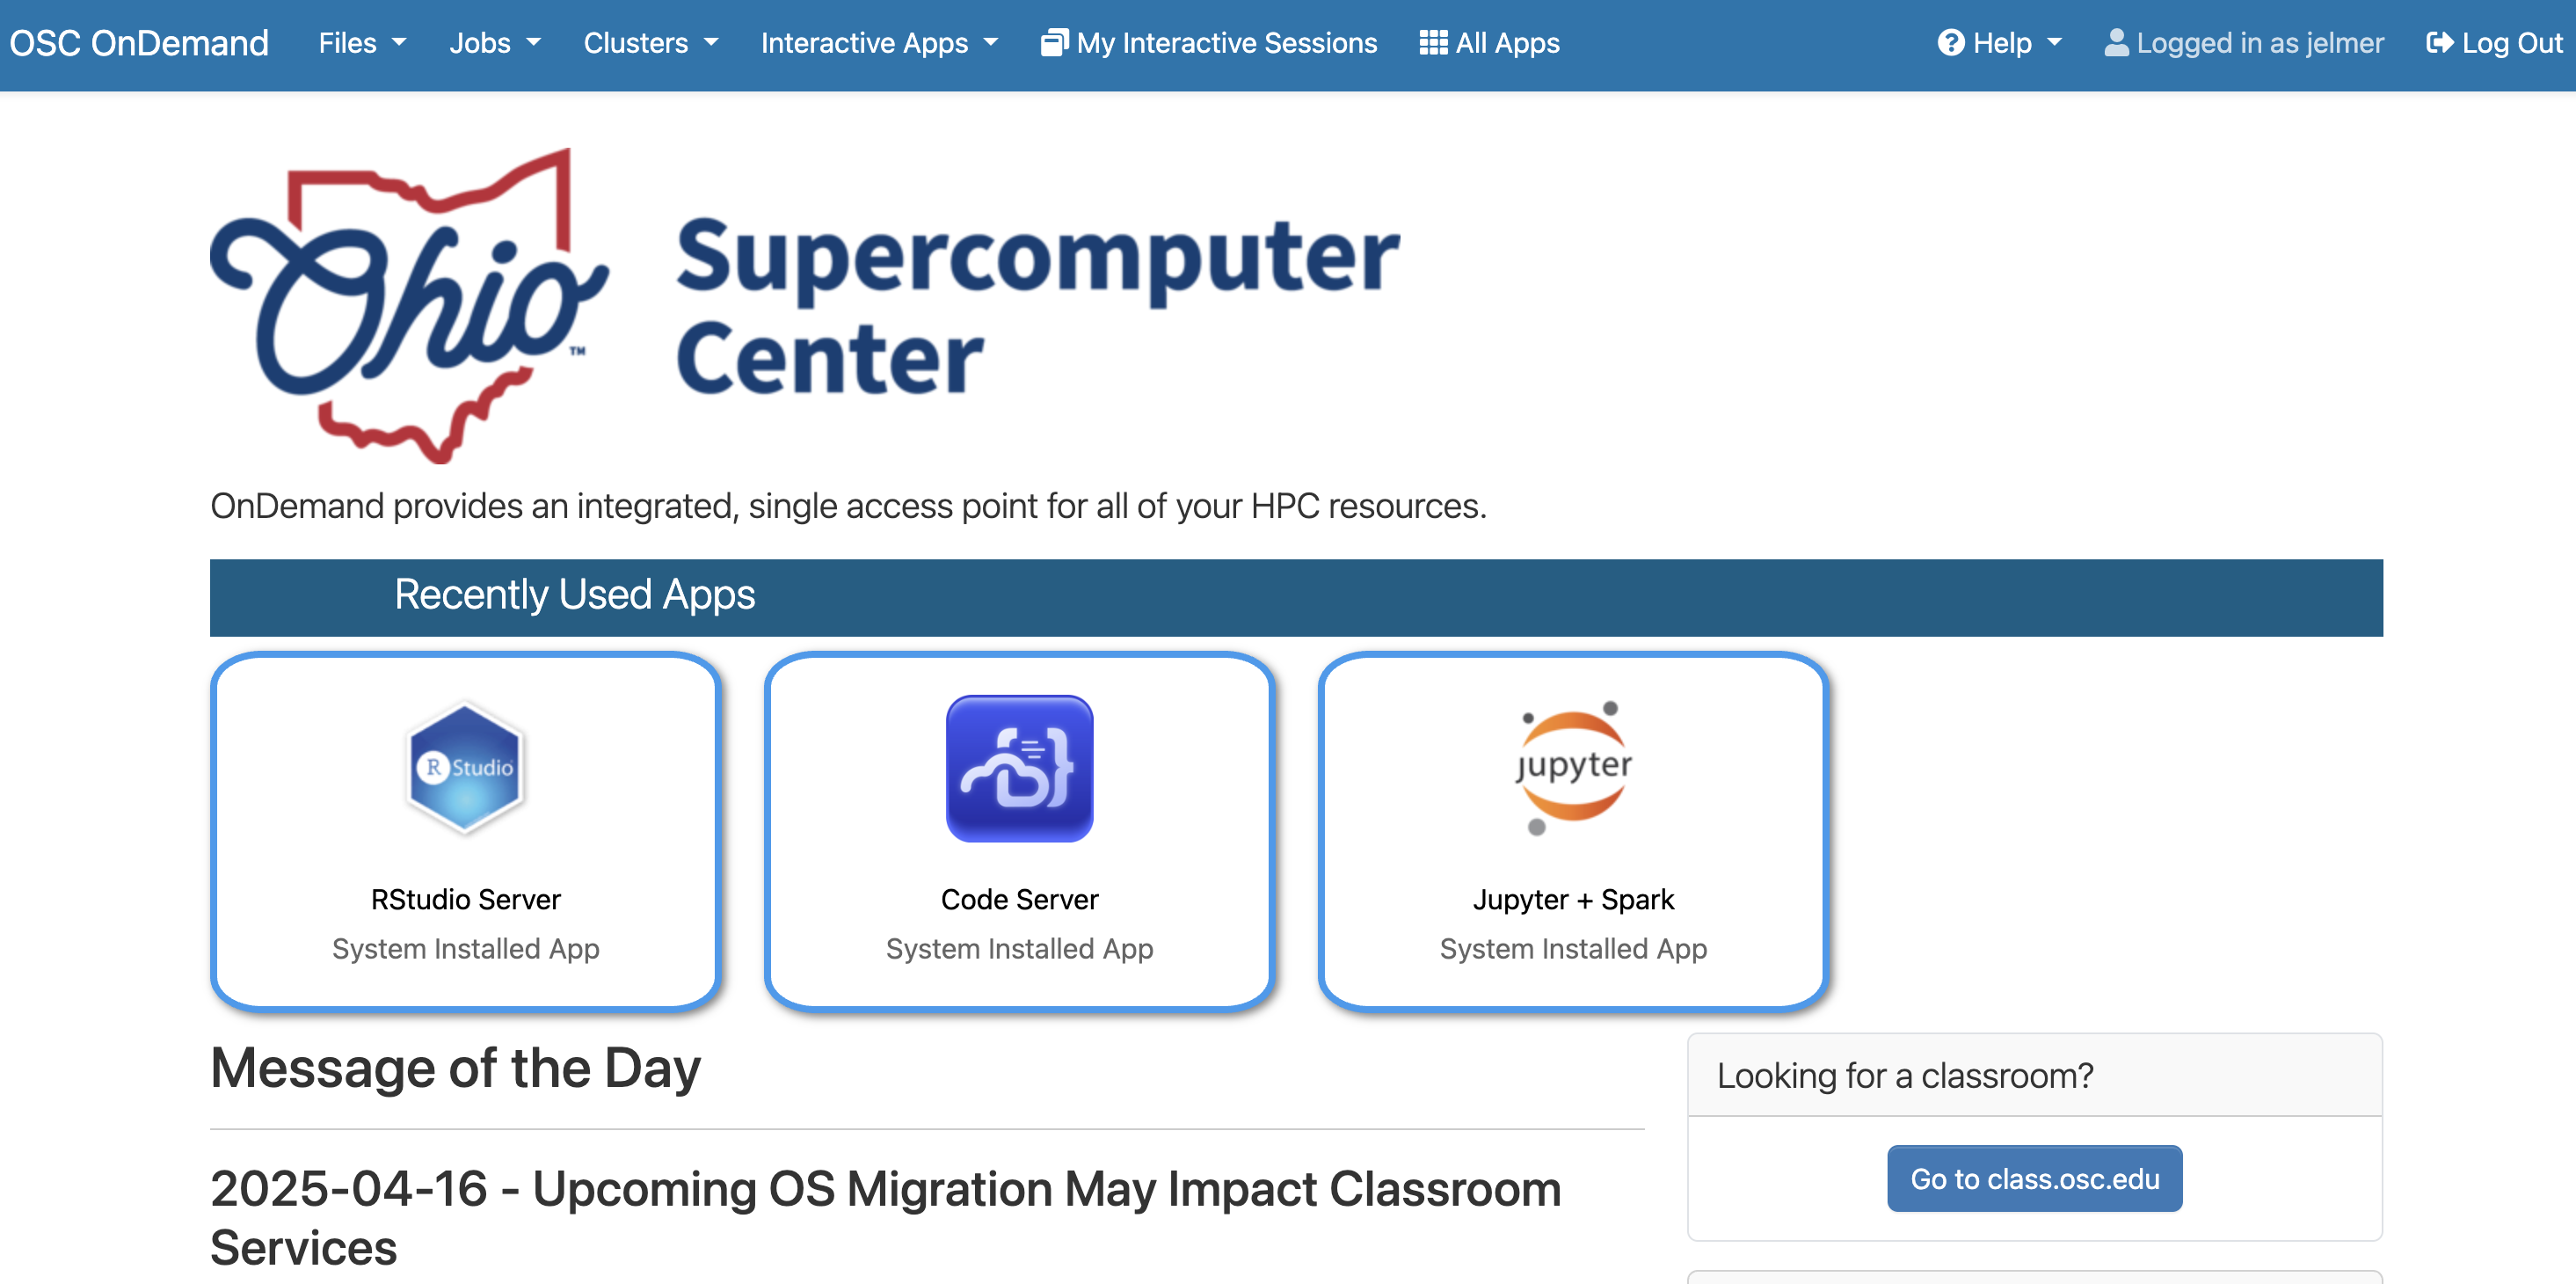
The OSC OnDemand web portal is a great resource that allows you to access OSC resources within a web browser.
Go to https://ondemand.osc.edu and log in (use the boxes on the left-hand side). Once logged in, you should see a landing page similar to the one below:
We will now go through some of the dropdown menus in the blue bar along the top:
5.1 Files menu
Hovering over the Files dropdown menu gives a list of folders you can access. If your account is brand new and was created after you were added to PAS3454, you should only see three folders listed:
- A Home folder (starts with
/users/) - The
PAS3454project’s “project” folder (/fs/ess/PAS3454) - The
PAS3454project’s “scratch” folder (/fs/scratch/PAS3454)
As mentioned above: you will only ever have one Home folder at OSC, but for every additional project you are a member of, you will usually see additional /fs/ess and /fs/scratch folders appear.
Click on folder /fs/scratch/PAS3454. Once there, you should see the folders and files present at the selected location, and can click on folders to explore their contents:
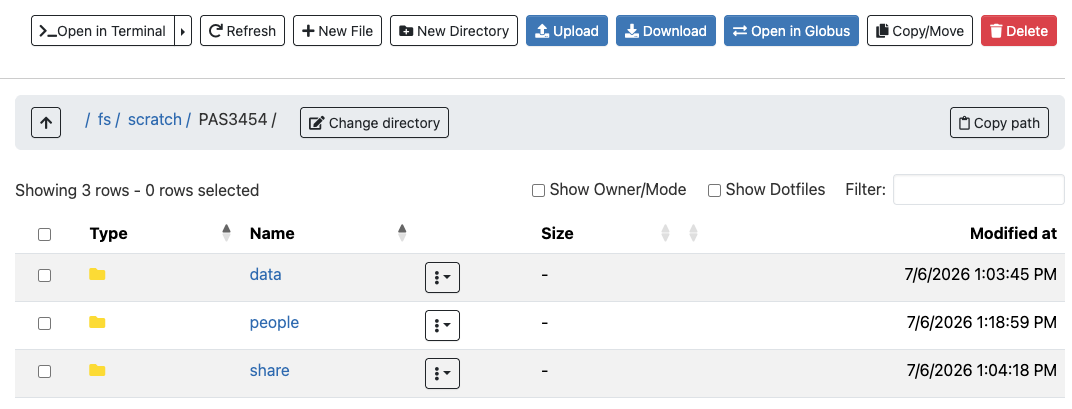
This interface is much like your own computer’s file browser, so you can also create, delete, move and copy files and folders, and even upload (from your computer to OSC) and download (from OSC to your computer) files.
Create a personal folder inside /fs/scratch/PAS3454/people:
- Click on the
peoplefolder - Click the “New Directory” button at the top
- Give the new folder the exact same name as your OSC username. (If you forgot your username, you can see it in the top-right corner of the OnDemand webpage.)
- Click on your new folder and within it, create one more folder:
pre(short for “pre-workshop”).
5.2 Interactive Apps menu
With the Interactive Apps dropdown menu, you can access programs with Graphical User Interfaces (GUIs; point-and-click interfaces), such as RStudio, Jupyter Notebook, VS Code, and many more.
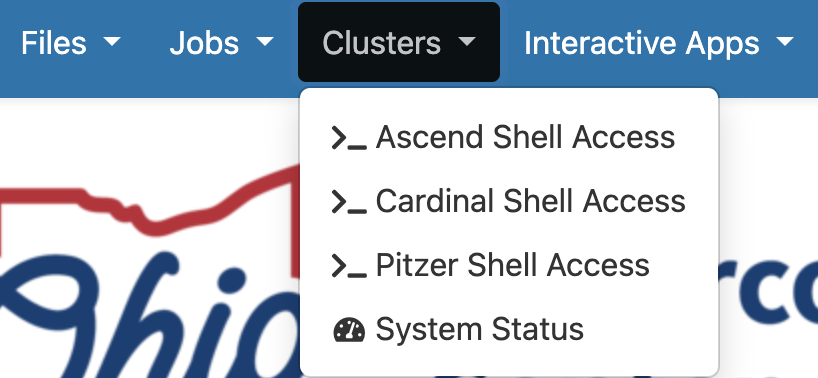
The Clusters menu gives access to a Unix Shell on each cluster, contains a page with information about installed software, and provides a page with live information about cluster usage. Here, we’ll just look at the latter.
In the “Clusters” dropdown menu, click on the item at the bottom, “System Status”:
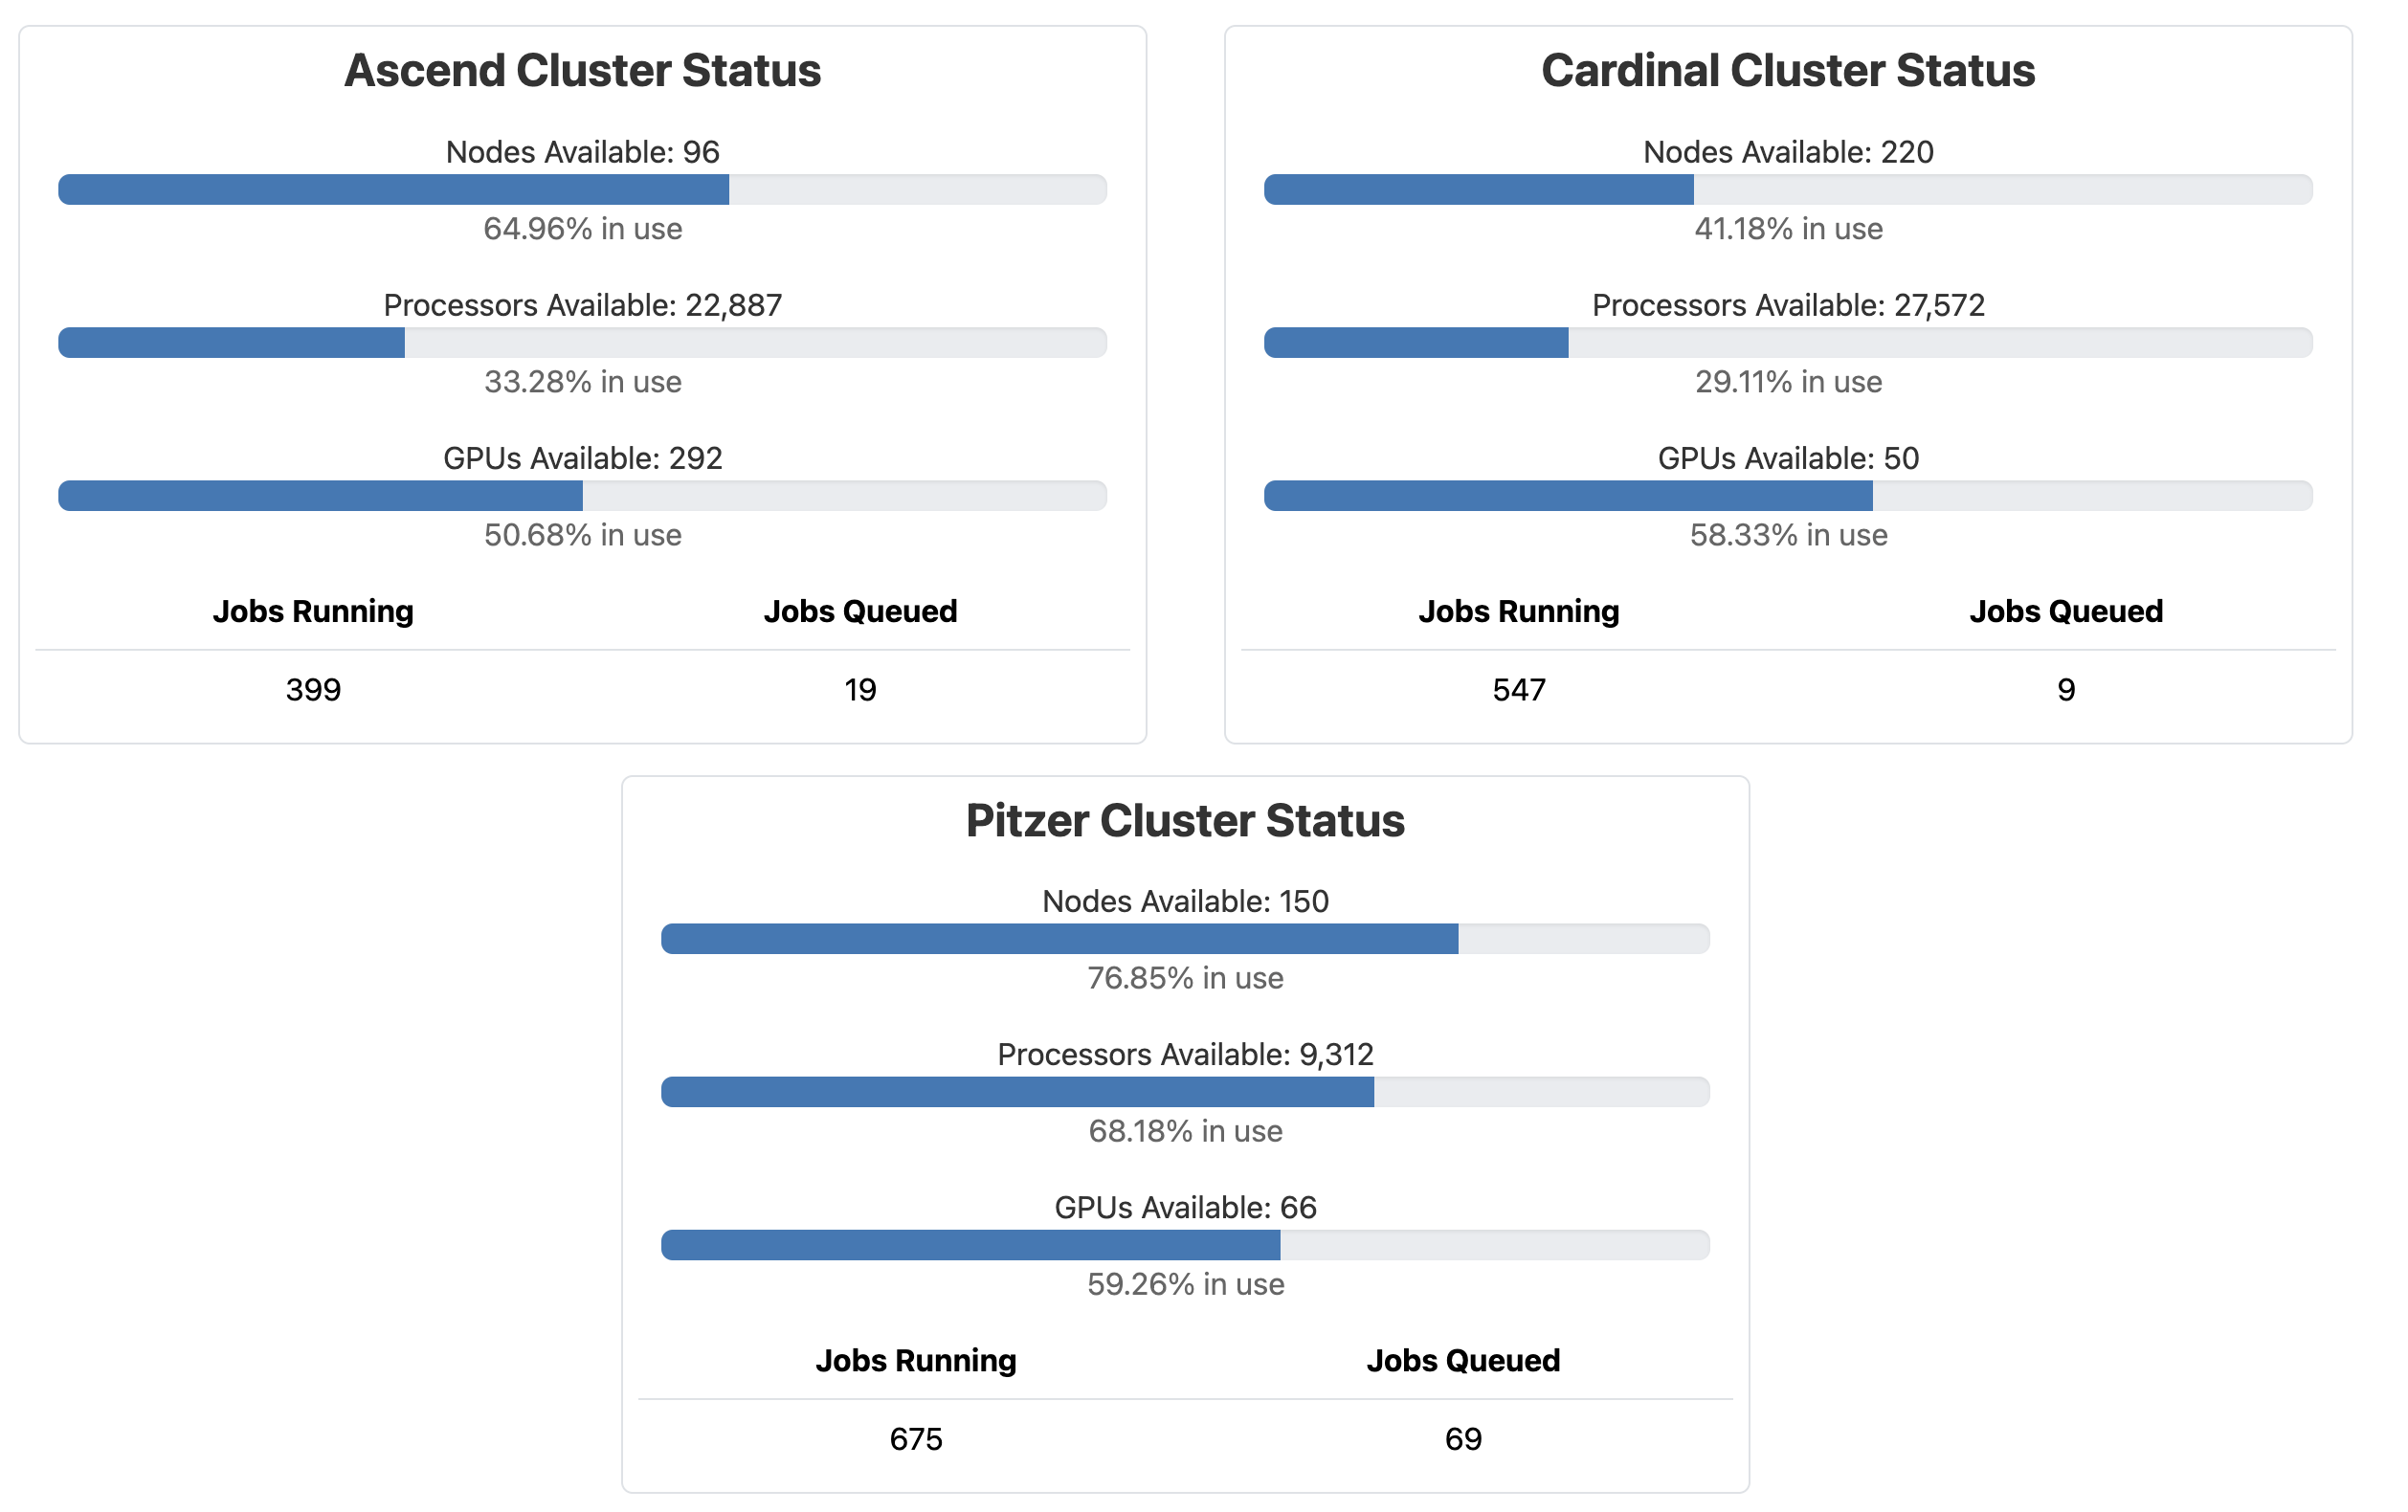
This page shows an overview of the live, current usage of the two clusters — for now, this should mostly just give you a good idea of the scale of the supercomputer center2.
6 VS Code
VS Code is basically a fancy text editor. Its full name is Visual Studio Code, and it’s called “Code Server” at OSC.
To emphasize the additional functionality relative to basic text editors like Notepad and TextEdit, editors like VS Code are also referred to as IDEs: Integrated Development Environments. The RStudio program is another good example of an IDE — and like RStudio is an IDE for R, VS Code will be our IDE for shell (and other) code.
In this session, we will use VS Code to practice with Unix shell basics and scripting.
6.1 Starting VS Code at OSC
In the Interactive Apps dropdown menu, near the bottom, click
Code Server.Interactive Apps like VS Code and RStudio run on compute nodes (not login nodes). Because compute nodes always need to be “reserved”, we have to fill out a form and specify the following details:
- The Cluster we want to use:
Pitzer - The Account, the OSC Project to be billed for the compute node usage:
PAS3454 - The Number of hours we want to make a reservation for:
2 - The Working Directory (starting location – replace
<user>with your OSC username):/fs/scratch/PAS3454/people/<user>/pre - The App Code Server version:
4.8.3(the only available option)
When selecting the Working Directory, don’t get confused by the “Select Path” button. This is an alternative to typing the path in the text box, not a way to confirm the path you typed.
- The Cluster we want to use:
Click
Launchand you’ll be sent to the My Interactive Sessions page with a card for your job at the top.First, your job may be Queued for some seconds (i.e., waiting for computing resources to be assigned to it), but it should soon switch to Starting and then be ready for usage (Running) in another couple of seconds:
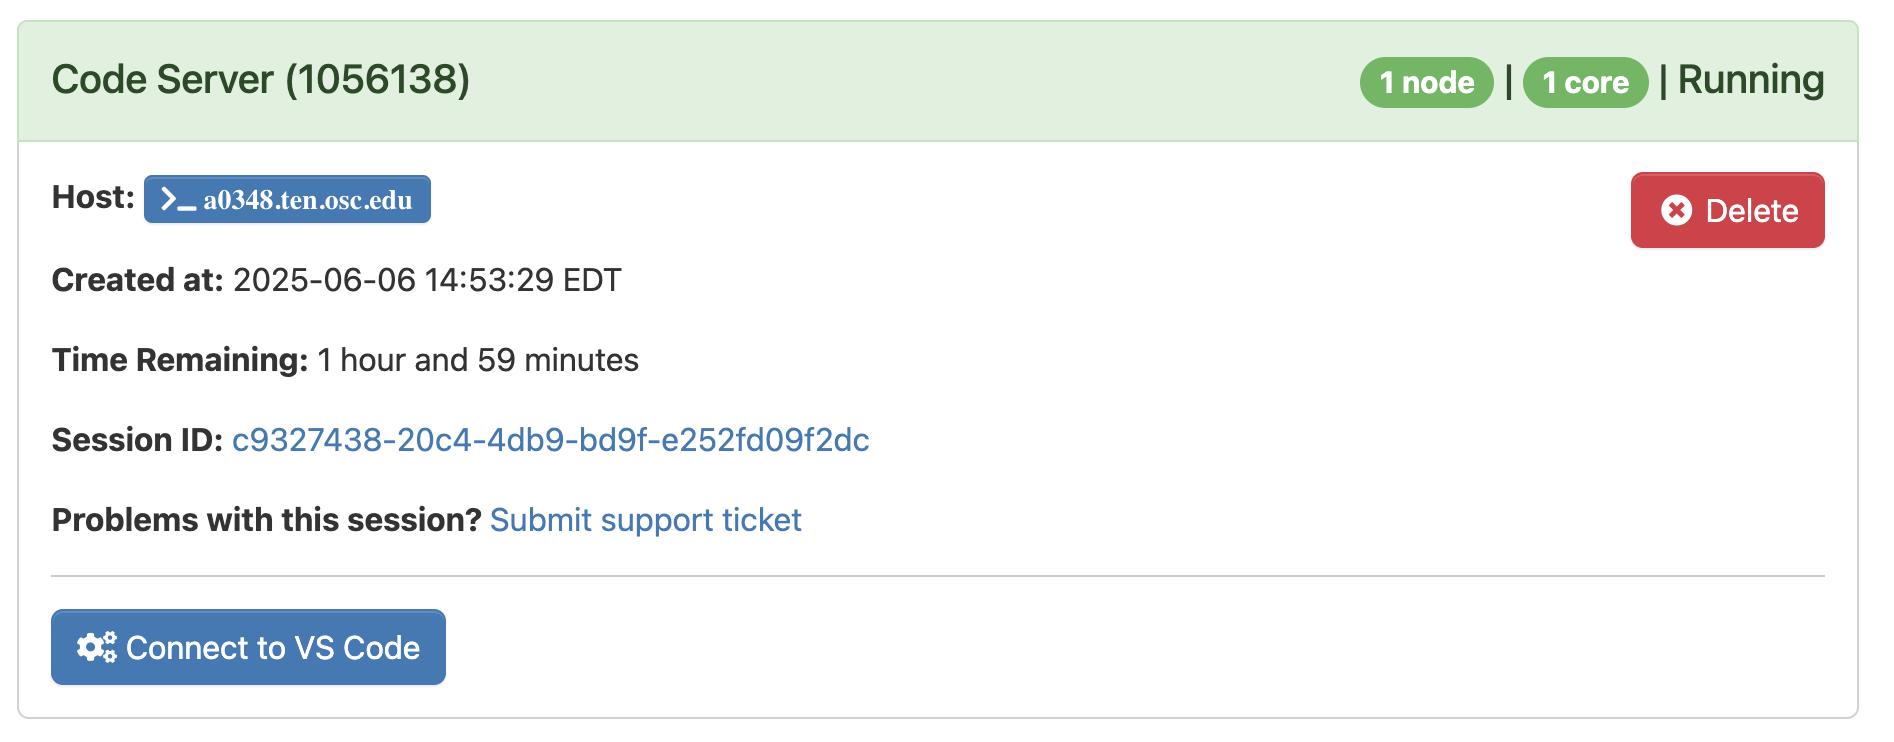
Once the blue Connect to VS Code button appears, click that to open VS Code in a new browser tab.
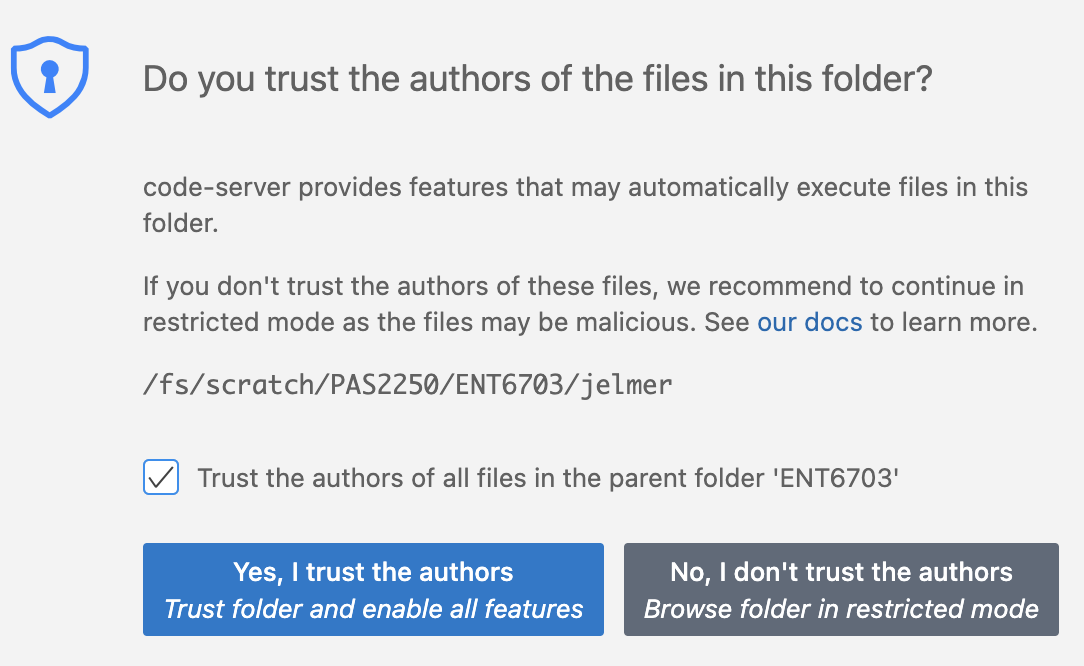
When VS Code opens, you may get a pop-up similar to this — click “Yes” and check the box:
- You’ll also see a Welcome document — you don’t have to go through any steps suggested there.
Congratulations: you have started your first compute job at OSC! 🥳
6.2 Open a Terminal with a Unix shell
In VS Code, open a terminal by clicking > Terminal > New Terminal. We’ll use this to practice with Unix shell commands next.